Friday, September 24, 2010

Harvesting Rosemary for Your Kitchen Use

Dried rosemary in a sachet
When you've got a lovely rosemary bush in the garden, or an abundant one growing in your neighbour's garden, it's worth harvesting it and keeping some in your kitchen for cooking.

Select a fresh and abundant rosemary bush. It's best to harvest on a fine day rather than harvesting wet or moist rosemary. Cut as much as you would like to store.

Create bundles from the cut rosemary. Remove any straggling bits or loose pieces. Tie each bundle together, leaving some of the string or ribbon dangling. Hang the bundles up in a dry, dark, and well ventilated space to dry. It'll take a few weeks to dry completely.

Untie the dried rosemary and run your hand down each stem to remove the individual rosemary leaves. Capture the leaves on baking paper or a chopping board and tip into a storage jar using a funnel.

Make Your Own Lavender Potpourri to Protect Clothing

Lavender sachets
Lavender is always a delightful scent. When storing clothing or linen, lavender can help keep the linen smelling fresh and can deter moths and silverfish. This potpourri is easy to make and will last well.

You'll need the following:
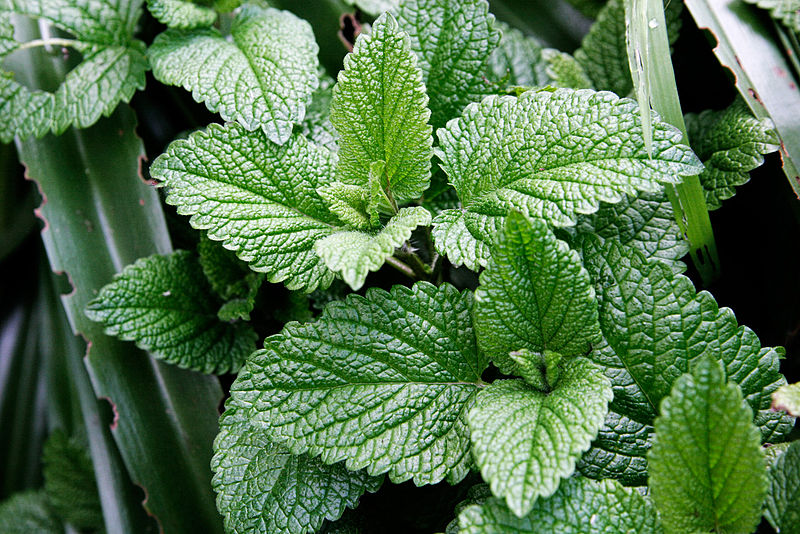
  • 10 cups lavender leaves and flowers
  • 3 cups coarse rock salt
  • 1 cup coriander seeds, crushed
  • 1 cup cinnamon and nutmeg, mixed and crushed (use fresh nutmeg if possible)
  • 1/2 - 1 tbsp (6 - 12.5ml) lavender oil
Press the lavender flowers and leaves together in a mortar and pestle. As you're doing this, enjoy the delightful scent that wafts up! When pressed, layer them alternately with the rock salt in a suitably sized jar. Keep filling until you reach the top. Use something heavy to press down on the layers, such as a decently sized pebble or rock, or something else from around the house.

Set it aside for 10 days. Remove the layers from the jar and place on a chopping board. Break up the ingredients and return them to the jar. This time, also add the spices and the lavender oil. Leave to stand for another 10 days.

It's ready to use now. It can be used in different ways but sachets are really ideal because these contain the mixture well and can be placed in storage areas. Add sachets to your linens, blankets, folded clothing, sheets, etc. for protection. Tuck them into pockets of clothing or hang around coat hangers.

Another way to use them is to pour into small jars with holes poked into the lids; place in drawers, etc.

Let me know if you make these and how you found them!

Sunday, September 5, 2010

Revving up again!

 Chocolates anyone? I say, why not?!

I abandoned this blog for a while as I experimented with a wide variety of other blog and online content creation experiences. I've decided to resume this one because it's the blog closest to my heart and the blog I think I can add the most useful things for everyone to enjoy. It's also helpful for my other projects too and I hope it'll be a source of inspiration for many of you! Like me, it's eclectic and my idea of what is sustainable is based on what is obtainable fairly, through resourcefulness and by being considerate of the environment, all species, and all people, so it's wide in its coverage!

So, without further ado, my expanded sustainable lifestyle toolbox will be coming back to life on a semi-regular basis! Thanks for your reads and patience everyone!

Sunday, March 8, 2009

Create a Faerie Garden with Your Kids


The faeries are there but they won't stay unless you make it inviting. Young children between the ages of 3 and 8 can have fun making and caring for a faerie garden. Help make their wishes come true and spend quality time engaging with your children (or the neighbour's or community's) by building a faerie garden together, filled with the stuff of their dreams. In the process, they learn about gardening and the beauty of nature, as well as forming concepts about turning imagination into something artistic and creative.

Steps
  1. Draw a plan on paper with your child's input. Ask him or her what shape he or she would like (or simply provide a pre-decided shape if your garden space is limited). Using this shape, map out the sorts of things your faerie garden will contain. See ideas under "Tips".
  2. In the garden, plan out the plot that will make the faerie garden. It should be somewhere child-friendly and less accessible to dogs, puppies and cats who might mess with it. Fence it off with small garden fences if necessary (little blunt wooden picket fences are cute - available from hardware or dollar stores).
  3. Together with your child, dig over the garden so that the soil is ready for planting and is easy to manipulate when you place the faerie pieces in it. Fertilize if necessary.
  4. Place a square or circle paver upon which the main feature piece will sit. A terracotta coloured cement paver is ideal. Place a statue on this square/circle, such as a mushroom, faerie, animal or other feature item that the child has chosen.
  5. Mark out a larger outer faerie circle which surrounds this feature piece. Plant a circle of flowers chosen by the child around the inner circle. Edge this outer circle with upright border blocks (the wavy ones are nicest).
  6. Next to the large circle, make little faerie circles using river stones, pebbles etc. Place plants inside these circles, or little trinkets chosen by the child. You could also make other shapes such as cat faces, dogs, triangles, diamonds etc from the pebbles; imagination is the only limit.
  7. Add extra faerie pieces. A faerie table and chairs can be made from various sizes of pavers. Purchase a small child's tea-set from a dollar store and place on the table for the faeries to have tea.
  8. Follow your child's imagination to include other items in the garden - listen to their ideas and try to adapt to them with items on hand.
  9. Remind your child to keep the flowers watered regularly. While watering, they can check for faeries. Encourage them to leave little gifts for the faeries (small pieces of fruit, seeds, whatever they like). This will ease the transition from stubborn disinterest in gardening to enjoying it!
  10. Have a special tea party to open the faerie garden. Invite other family members, friends and neighbors over to marvel at the little garden and to provide the child with encouragement for it.

Tips
  • Fun things for a faerie garden can be found in garden stores. Ideas include: shiny glass pebbles, river pebbles, pavers, miniature statues, solar lights, terracotta worms, wooden insects, wooden flowers, candle light holders, faerie lights (with adult supervision only), and so on.
  • Dollar stores can be a source of extra features such as: beads, foil, glittery pieces, tiny animal toys, little miniature faeries, wooden pieces etc. Have fun with your imagination.
  • Flowers should be colorful and easy to grow. Buy some as seeds and some as seedlings, so that children can see the seeds grow but can also see real flowers from the start.
  • If you are able to string things up over the garden, the children can make art pieces using foil, CDs and other shiny objects. If near a vegetable garden or fruit trees, the glinting objects will help to discourage birds from landing to ravage the produce.
  • Little statues with in-built solar powered lights are fantastic. These are a delight to children after dark when they can walk out and see a little glow that attracts moths - and faeries!
  • Use faerie books borrowed from the library to give you more inspiration - children will enjoy looking at the different ideas.
  • For boys who think faeries are not their idea of fun, change to elves, pixies, gnomes etc.; or explain that there are boy faeries too and they used to look after the dinosaurs...

Advisories
  • Be careful the items used are age-suitable - no small pieces where children under 3 or puppies can gain access.
  • If you use potting soil, keep children away from the bag to avoid possible breathing in of legionella germs found in some potting mixes. Also take care of your own respiratory health.
  • Make sure items left out are weather-resistant.
  • Place items in garage for over-wintering or they may crack, rust etc.
  • If you use any electricity, make sure it is outdoor use compatible and that all exposed wires etc cannot be reached or pulled by small children and pets.
  • Always wash hands well after gardening.

Things You'll Need
  • Terracotta pavers
  • Terracotta borders
  • Faerie stuff


Wednesday, January 14, 2009

Mint for your chewing gum?


Wrigley's needs about 53 square miles of mint plants to make its mint flavoured chewing gums. That's about 30,550 football fields full of mint plants!

Photo courtesy of Wikimedia Commons.

Monday, December 22, 2008

Growing Kiwifruit


Kiwifruit (Actinidia chinensis) is originally from China and is also known as Chinese gooseberry. It is both edible and ornamental and grows as a vine that is vigorous and strong. If you are keen on growing it at home, be sure to have supporting space. Here are some tips for growing it.

  1. Erect a strong support about 2 metres high. This will also need to have some good width, to support th spread of the vine and its weight with fruit.
  2. Purchase a male and a female plant. You will need both to be able to produce fruit.
  3. Plant in full sun in rich soil that is well-drained. Kiwifruit do not like having dry feet, so be sure to keep well watered during the warmer months.
  4. Protect kiwifruit plants from strong winds and from frost. Provide a sheltered area if this is a problem.
  5. Prune the male plant after it flowers in late spring. Prune the female plant in winter. The fruit arises from new growth, so it is important to prune back any old wood that has already borne fruit.
Prune heavily to control the overall size of each plant.

  • Male kiwifruit plant and female kiwifruit plant
  • Good support materials
  • Fertiliser
  • Pruning equipment

Photo courtesy of Rengber's Flickr Photostream.

Sunday, December 21, 2008

Lavender Breath Freshener


Lavender breath freshener is a non-toxic way to keep your breath smelling fresh. Before starting this preparation, be sure to have clean hands.


Ingredients
  • 1 tbsp lavender flowers
  • 2 tbsp icing sugar/confectioner's sugar
  • 2-3 drops lavender oil
  • 1 egg white, whisked

Mix the ingredients together until smooth.
Select small portions of the mixture. Roll into small balls about the size of a pea.
Set aside on a sheet of baking paper or a china plate. Allow to dry for 24 hours, or until firm.
Store in an air-tight container or wrap in wax paper for taking with you.
Chew when needed. A delicious taste and aroma of lavender will fill your mouth.

Tips
  • If egg white causes you concern, substitute with honey or other syrup. Make sure you buy fresh eggs from a reputable seller.
  • Always use organic lavender flowers when consuming them; provided you have used natural garden sprays in your garden, the flowers will be fine for use.

Supplies Needed
  • Mixing bowl
  • Sheet of baking paper or a china plate
  • Air-tight container or wax paper

Photo courtesy of AudreyJM529's Flickr Photostream.

Saturday, December 20, 2008

How to Make a Rose and Oatmeal Bath Mix


Rose and oatmeal are the perfect bath combination. Oatmeal is soothing to the skin and rose is uplifting. Rose essential oil is used for its anti-inflammatory and rejuvenating qualities.


  • 5 cups of oats
  • Essential oil of rose
  • Rose petals (fresh)(optional)

  1. Place the oats in the blender. Blend until the oats become finely ground.
  2. Put the oats into the item of choice for containing the oats. Tie together with a ribbon or string.
  3. Attach the ribbon or string to the tap (faucet) as close under the spigot as possible. Allow warm water to run into the bath, moving through the oat bag.
  4. Add 2 - 3 drops of the rose oil direct to the bathwater and swirl around.
  5. Add the rose petals.
  6. Enjoy a luxurious bath.


  • Blender
  • Cheesecloth, coffee paper filter, sachet bag etc. - any suitable item to hold the oats mixture
  • Ribbon or string; needs to be long enough to hang from tap (faucet)
Photo courtesy of Athena's Pix Flickr Photostream.

Tuesday, October 28, 2008

Play Dictionary


When you're bored and there's nothing in the room but a stuffy old dictionary and a friend or two as bored as you, you're in luck. Dictionaries are a great read and you can take it in turns. No wait, that's not what this article is about! Some people might enjoy reading them but this is the ''game'' dictionary and it's a lot more fun. Play on.


Steps
1. Have at least two players. It's not only a little lonely by yourself but the game won't work. There isn't really any upper limit and a larger group can result in more shouting and merriment.
2. Pick the dictionary master/mistress/fiend. The name doesn't really matter provided this person can read and has a good imagination.
3. Have the dictionary fiend quickly flip through the dictionary looking for a difficult word. The dictionary fiend must quickly make up two alternative definitions and provide a real one as well. We'll use the word "irrefragable" as an example. The dictionary fiend would ask the other players:
Does the word "irrefragable" mean:
Something that cannot be unravelled or loosened?
**An argument or fact that cannot be disputed? [this is the right response but you don't tell]
**A fragrance that has gone off in a bad way?
4. Allow the players to answer. They are allowed to ask questions and the dictionary fiend is allowed to embellish the answers. The first person to get it right gets a point.
5. Keep playing until a set number of points is won by a person (or a team if you prefer). Five is a good set number. The dictionary fiend is then the person who won (or a member of the team). Play for as long as the fun keeps going; it can become tiring after a while of guessing and it does tend to degenerate into very silly statements as people tire of it!

Tips
*The arguments can be great fun if you have good sports on the team.
*Be sure to have dictionary fiends who are good with making things up.

Materials
*A quality dictionary that has a lot of long, hard and long-forgotten English words in it. Most dictionaries should suffice.

Photo courtesy of Daquella Manera's Flickr photostream.

Monday, October 27, 2008

Rhubarb Pie


Rhubarb is delicious any way and especially in a pie. This recipe makes about 6 - 8 servings.

Ingredients


Pastry:
  • 200g plain flour
  • 50g brown sugar
  • 100g butter, cubed
  • 1 egg yolk
  • A little water
Filling:
  • 550g rhubarb stalks, cleaned and cut into 5cm pieces (discard the tips of the stalks)
  • 200 ml water
  • 1 tsp lemon juice
  • 100g sugar
  • 1 apple, peeled and cut into small pieces

Steps
  1. Mix the pastry ingredients together to form a soft dough.
  2. Boil the water with the lemon juice and sugar.
  3. Add the pieces of rhubarb to cook. Cook for around two minutes.
  4. Remove from the heat. Add the apple pieces and stir in.
  5. Drain the liquid and leave the fruit to cool.
  6. Roll the pie base.
  7. Add the cooled fruit and cover the pie with the top pastry piece and seal the edges.
  8. Prick the pie top a few times for steam vent holes.
  9. Place in the oven at 160ÂșC and cook for 20 minutes, or until golden.

Materials
  • Large cooking pot
  • Wooden spoon
  • Pie dish
  • Fork
Photo courtesy of Paul Goyette's Flickr Photostream.